Welcome to Technical Blogging with Jekyll Workshop!!
Today we are going to learn the basics of publishing and maintaining a blog to host your technical writing. You will create a static blog and learn how to host it for free on Github Pages. You can expect to walk away being confident modifying and customizing your blog to better fit your needs.
Slides for the workshop are viewable here: http://aboutmonica.com/codeland/jekyll.pdf
| Instructor | Teaching Assistant |
|---|---|
| Monica Powell | Nia Murrell |

| 
|
Installation
We will install the following software to run a Jekyll a blog. If you are on a Mac please run the following commands in your terminal. For windows users, these commands should be run in an application called, Git bash.
Install Git
Git is version control software. We will be using Git to download the initial software for our blog and to maintain version controlled instances of the content and code of our site. This will also make it easier for us to publish our blog on Github Pages later in the workshop.
- Install git by downloading software from: https://git-scm.com/downloads Confirm installation by running:
$ git -—version- Configure git with your name and e-mail address.
$ git config --global user.name "Joan Doe"$ git config --global user.email joandoe@example.com
Note: Replace Joan Doe with your name and e-mail address. Please be sure to use the same e-mail that is associated with your GitHub account.
Install Ruby
Jekyll is built using Ruby and thus Ruby is necessary in order to allow Jekyll to do its job!
- On Windows:
- Use RubyInstaller at https://rubyinstaller.org
- On Mac:
- By default Ruby may be installed depending on OS. If not:
$ brew install ruby
Helpful notes for Ruby Installation:
- Install Ruby and check that version is greater than 2.4.1:
$ Ruby -v
- If not install the latest version of Ruby:
$ rvm install ruby-2.5.1
- If wrong version of Ruby is being used:
$ rvm use —default 2.5.1
Install Bundler to manage Ruby application’s gems (dependencies):
$ gem install bundler
On GitHub
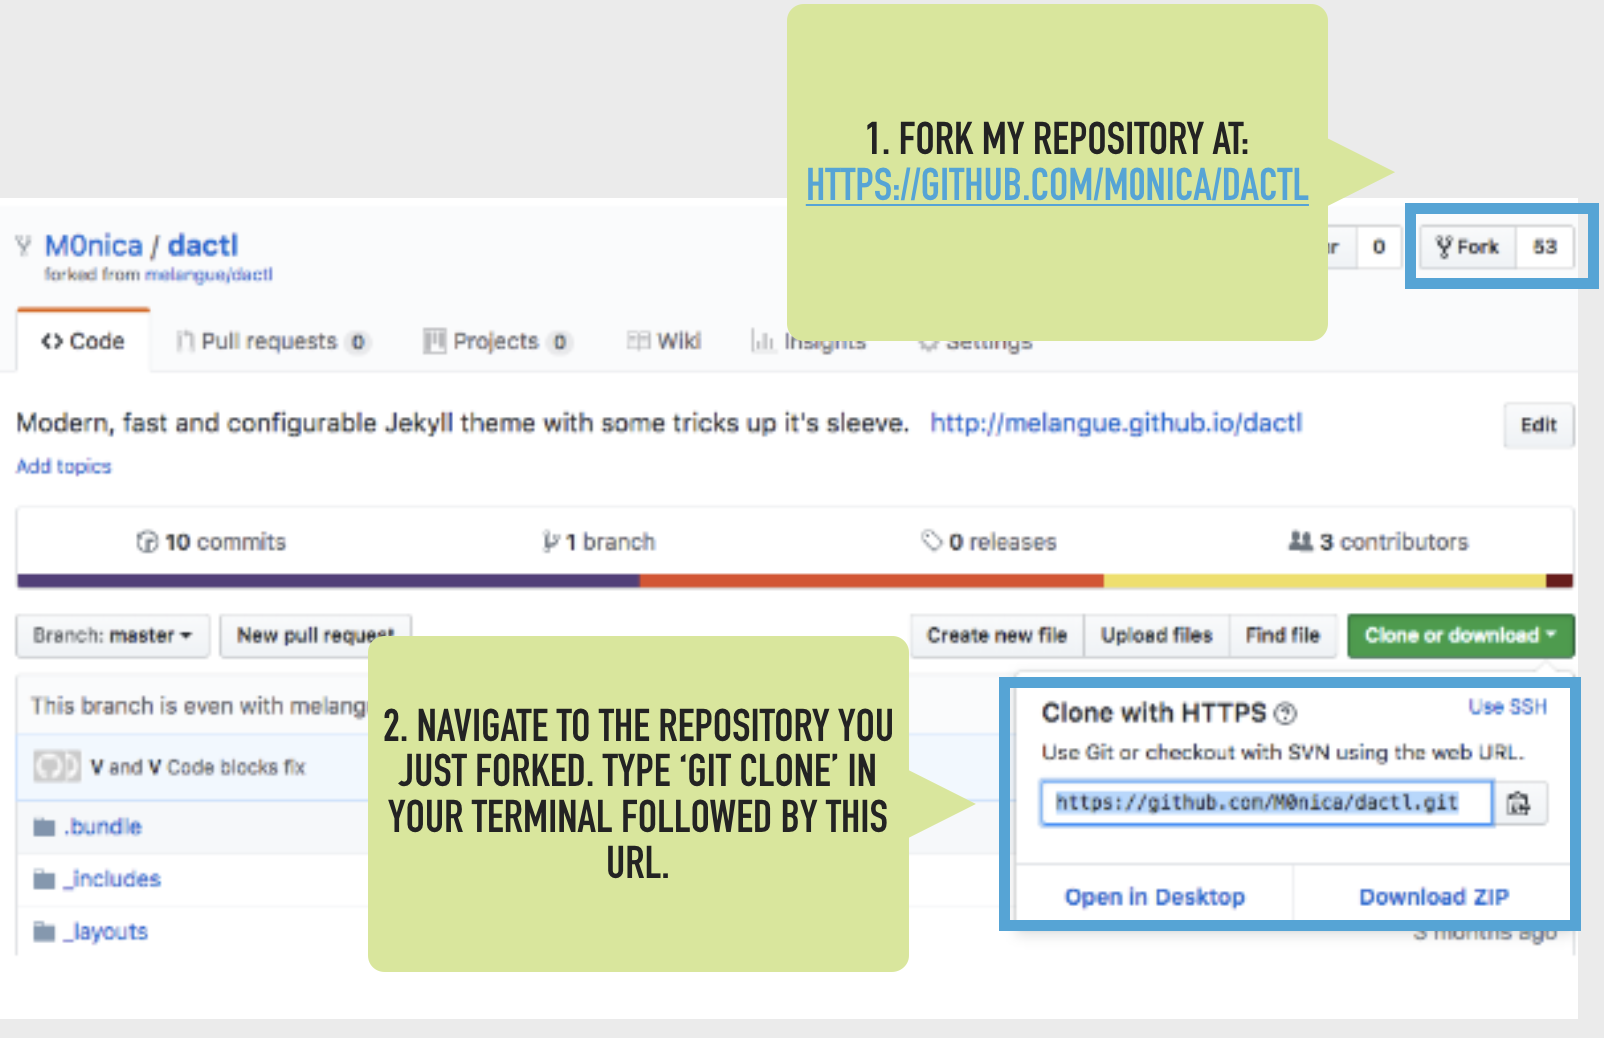
On GitHub.com fork this repository https://github.com/M0nica/dactl in order to make a copy of a working Jekyll site.
On command line:
Git clone https://github.com/YOUR_USERNAME/dactl- Replace
YOUR_USERNAMEwith your username! -
Note: GitHub may prompt you to login with your credentials.
- Install dependencies (a.k.a software needed to run our Jekyll project)
$ gem install bundler
- View Jekyll site locally on your computer
$ cd dactl$ bundle install$ bundle exec jekyll serve
We will be using our local server throughout the development cycle of our blog and whenever we are drafting content.